
Get a digital wallet
This is part of Velvet Basics, our newsletter on how to join the world of Web3. Today's topic: Set up a digital wallet using MetaMask and fund it with ETH in 10 minutes.

We’re back with your next Web3 basics article. Today we’re covering all things wallets; why you need a wallet, how to set your wallet up, and finally - what you can do with it.
What you’ll learn today: How to set up a wallet + fund it with digital currency.
Commitment: Ten minutes. You can do it all on your phone.
What’s a wallet and why should I have one?
A digital wallet lets you purchase things with digital currency. Think of it like your virtual debit card, native to the internet. In order to spend, you need assets (like ETH) available in the wallet to cover the purchase.
We already bought some ETH together last week (If you missed it, catch up 👉 here).
There are many wallets to choose from, so feel free to explore all your options. Today, we’re going to set up MetaMask. Once you have assets in one wallet, you can always transfer those assets to another wallet. Note, MetaMask is a non-custodial wallet. You can read more about what that means here.
Digital wallets also let you store assets, like NFTs. We’ll cover that topic in a future post.
How to install a wallet in 5 minutes
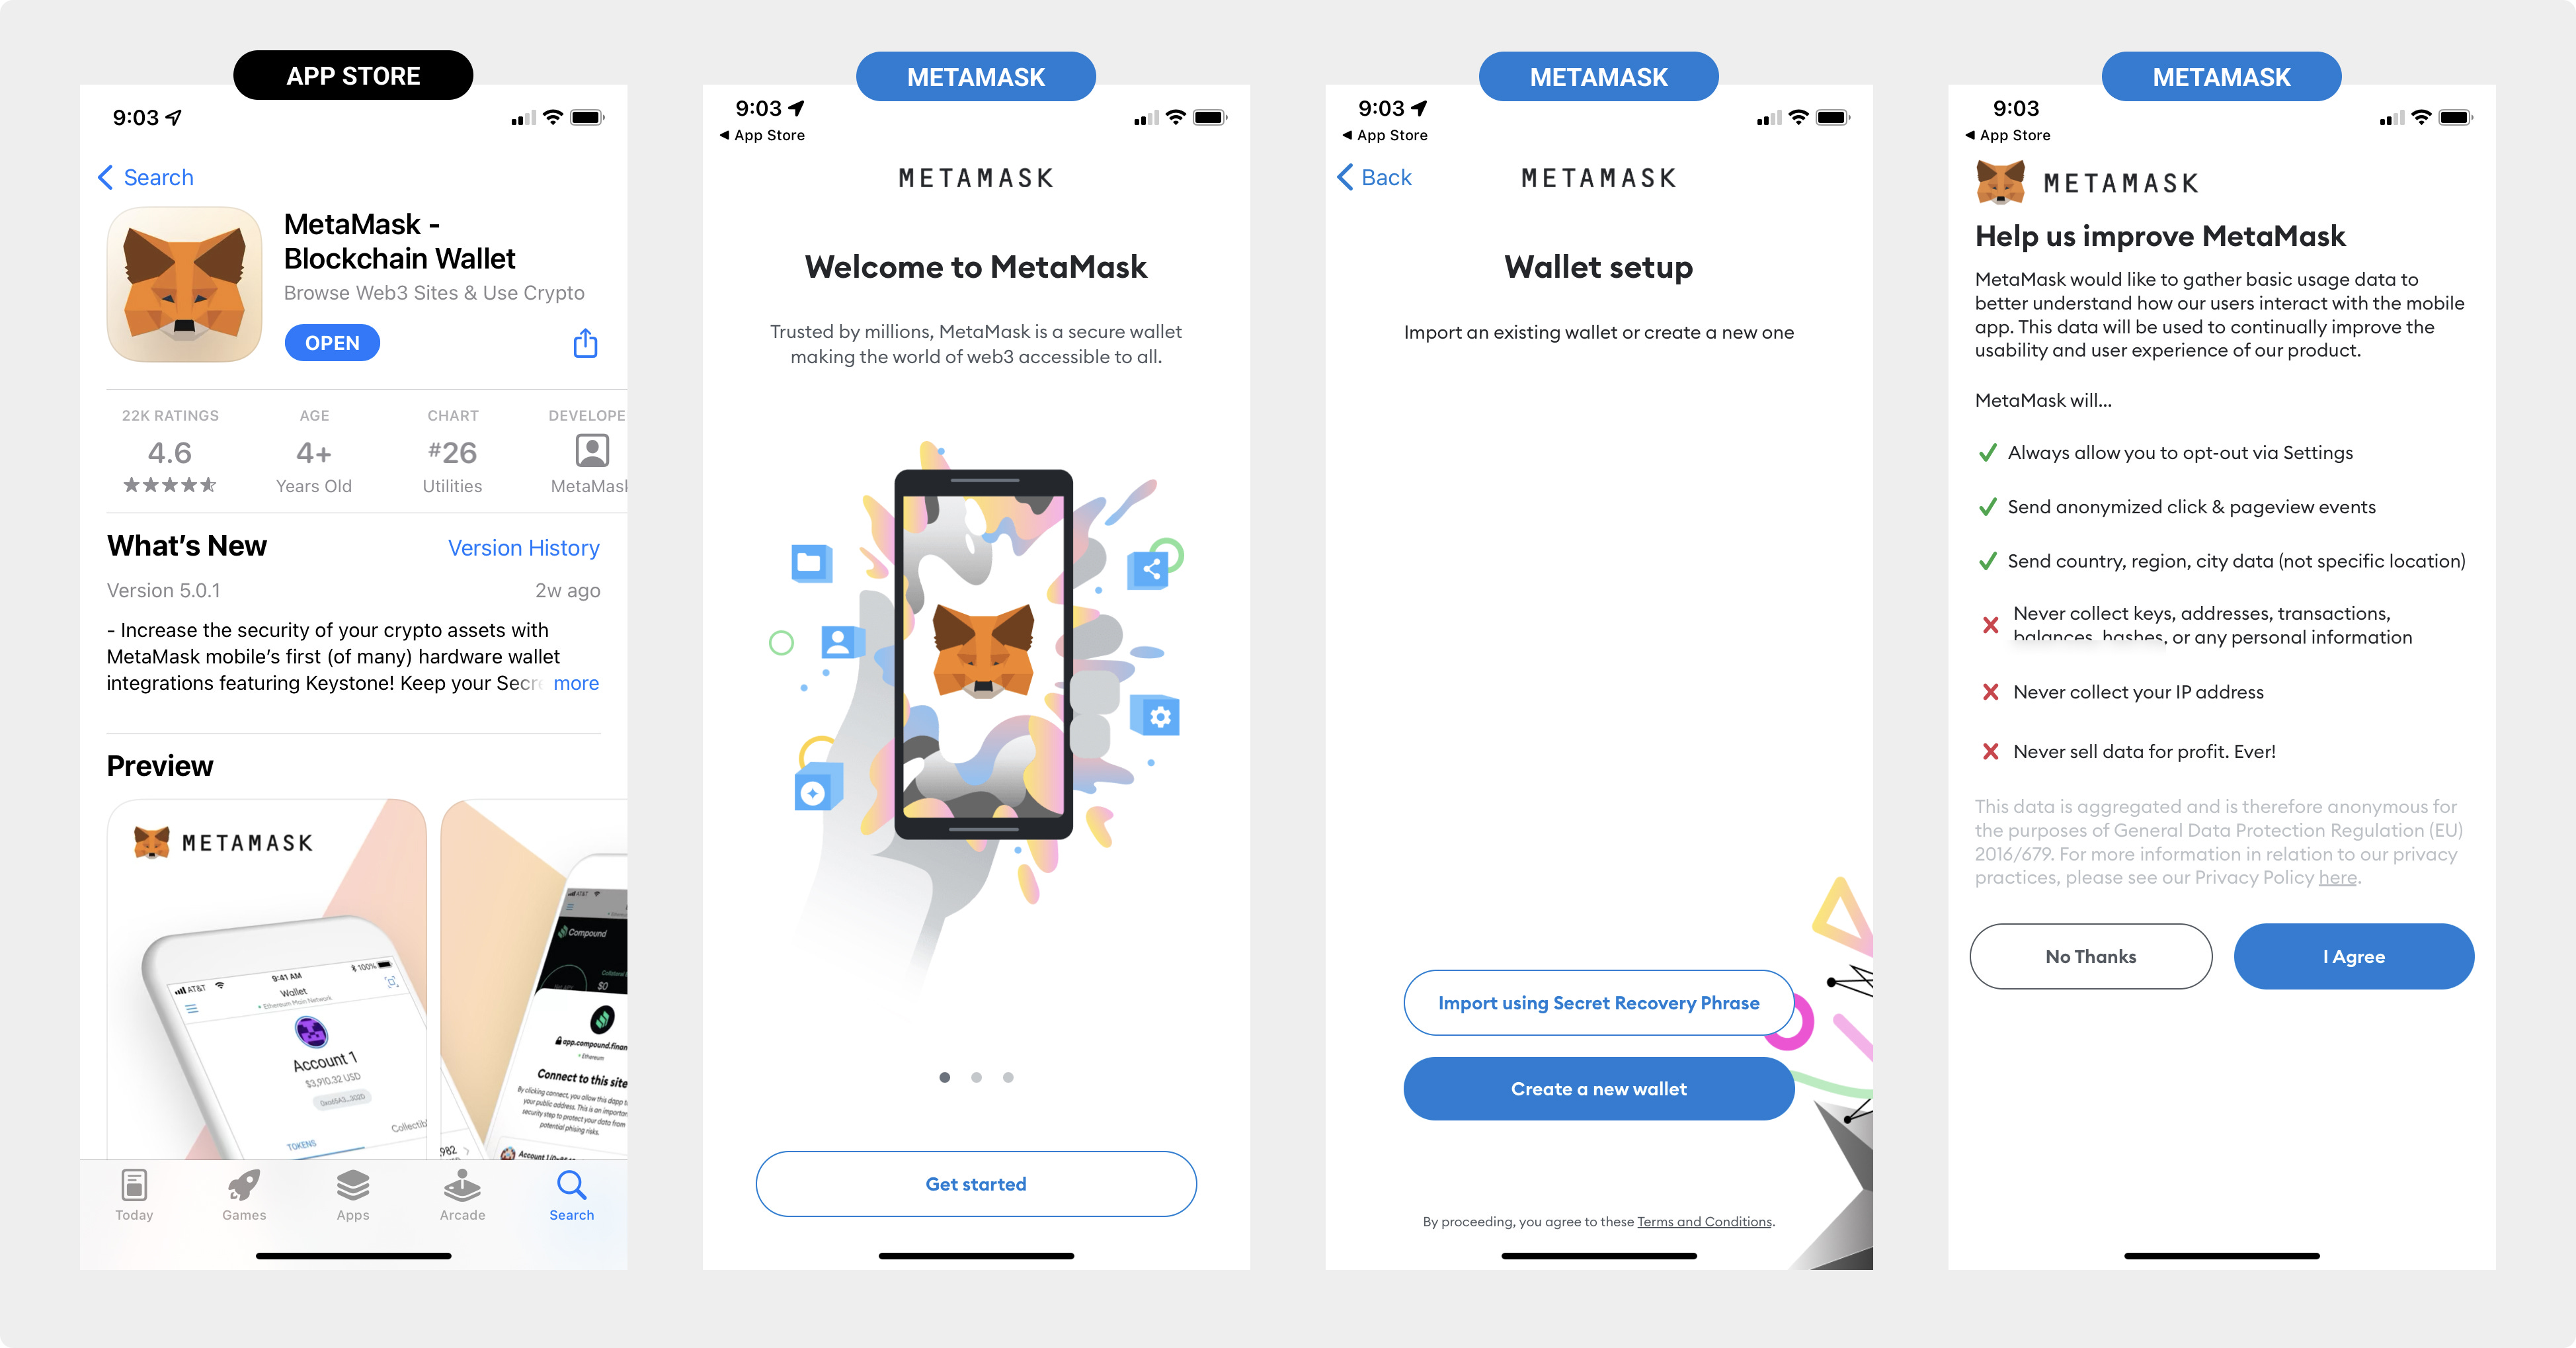
First, download the MetaMask app and create your account:
Get the app on your device.
Download from the App Store.
Press the “Get started” button on the splash screen.
Choose “Create a new wallet”.
You can opt in or out to the data usage request.
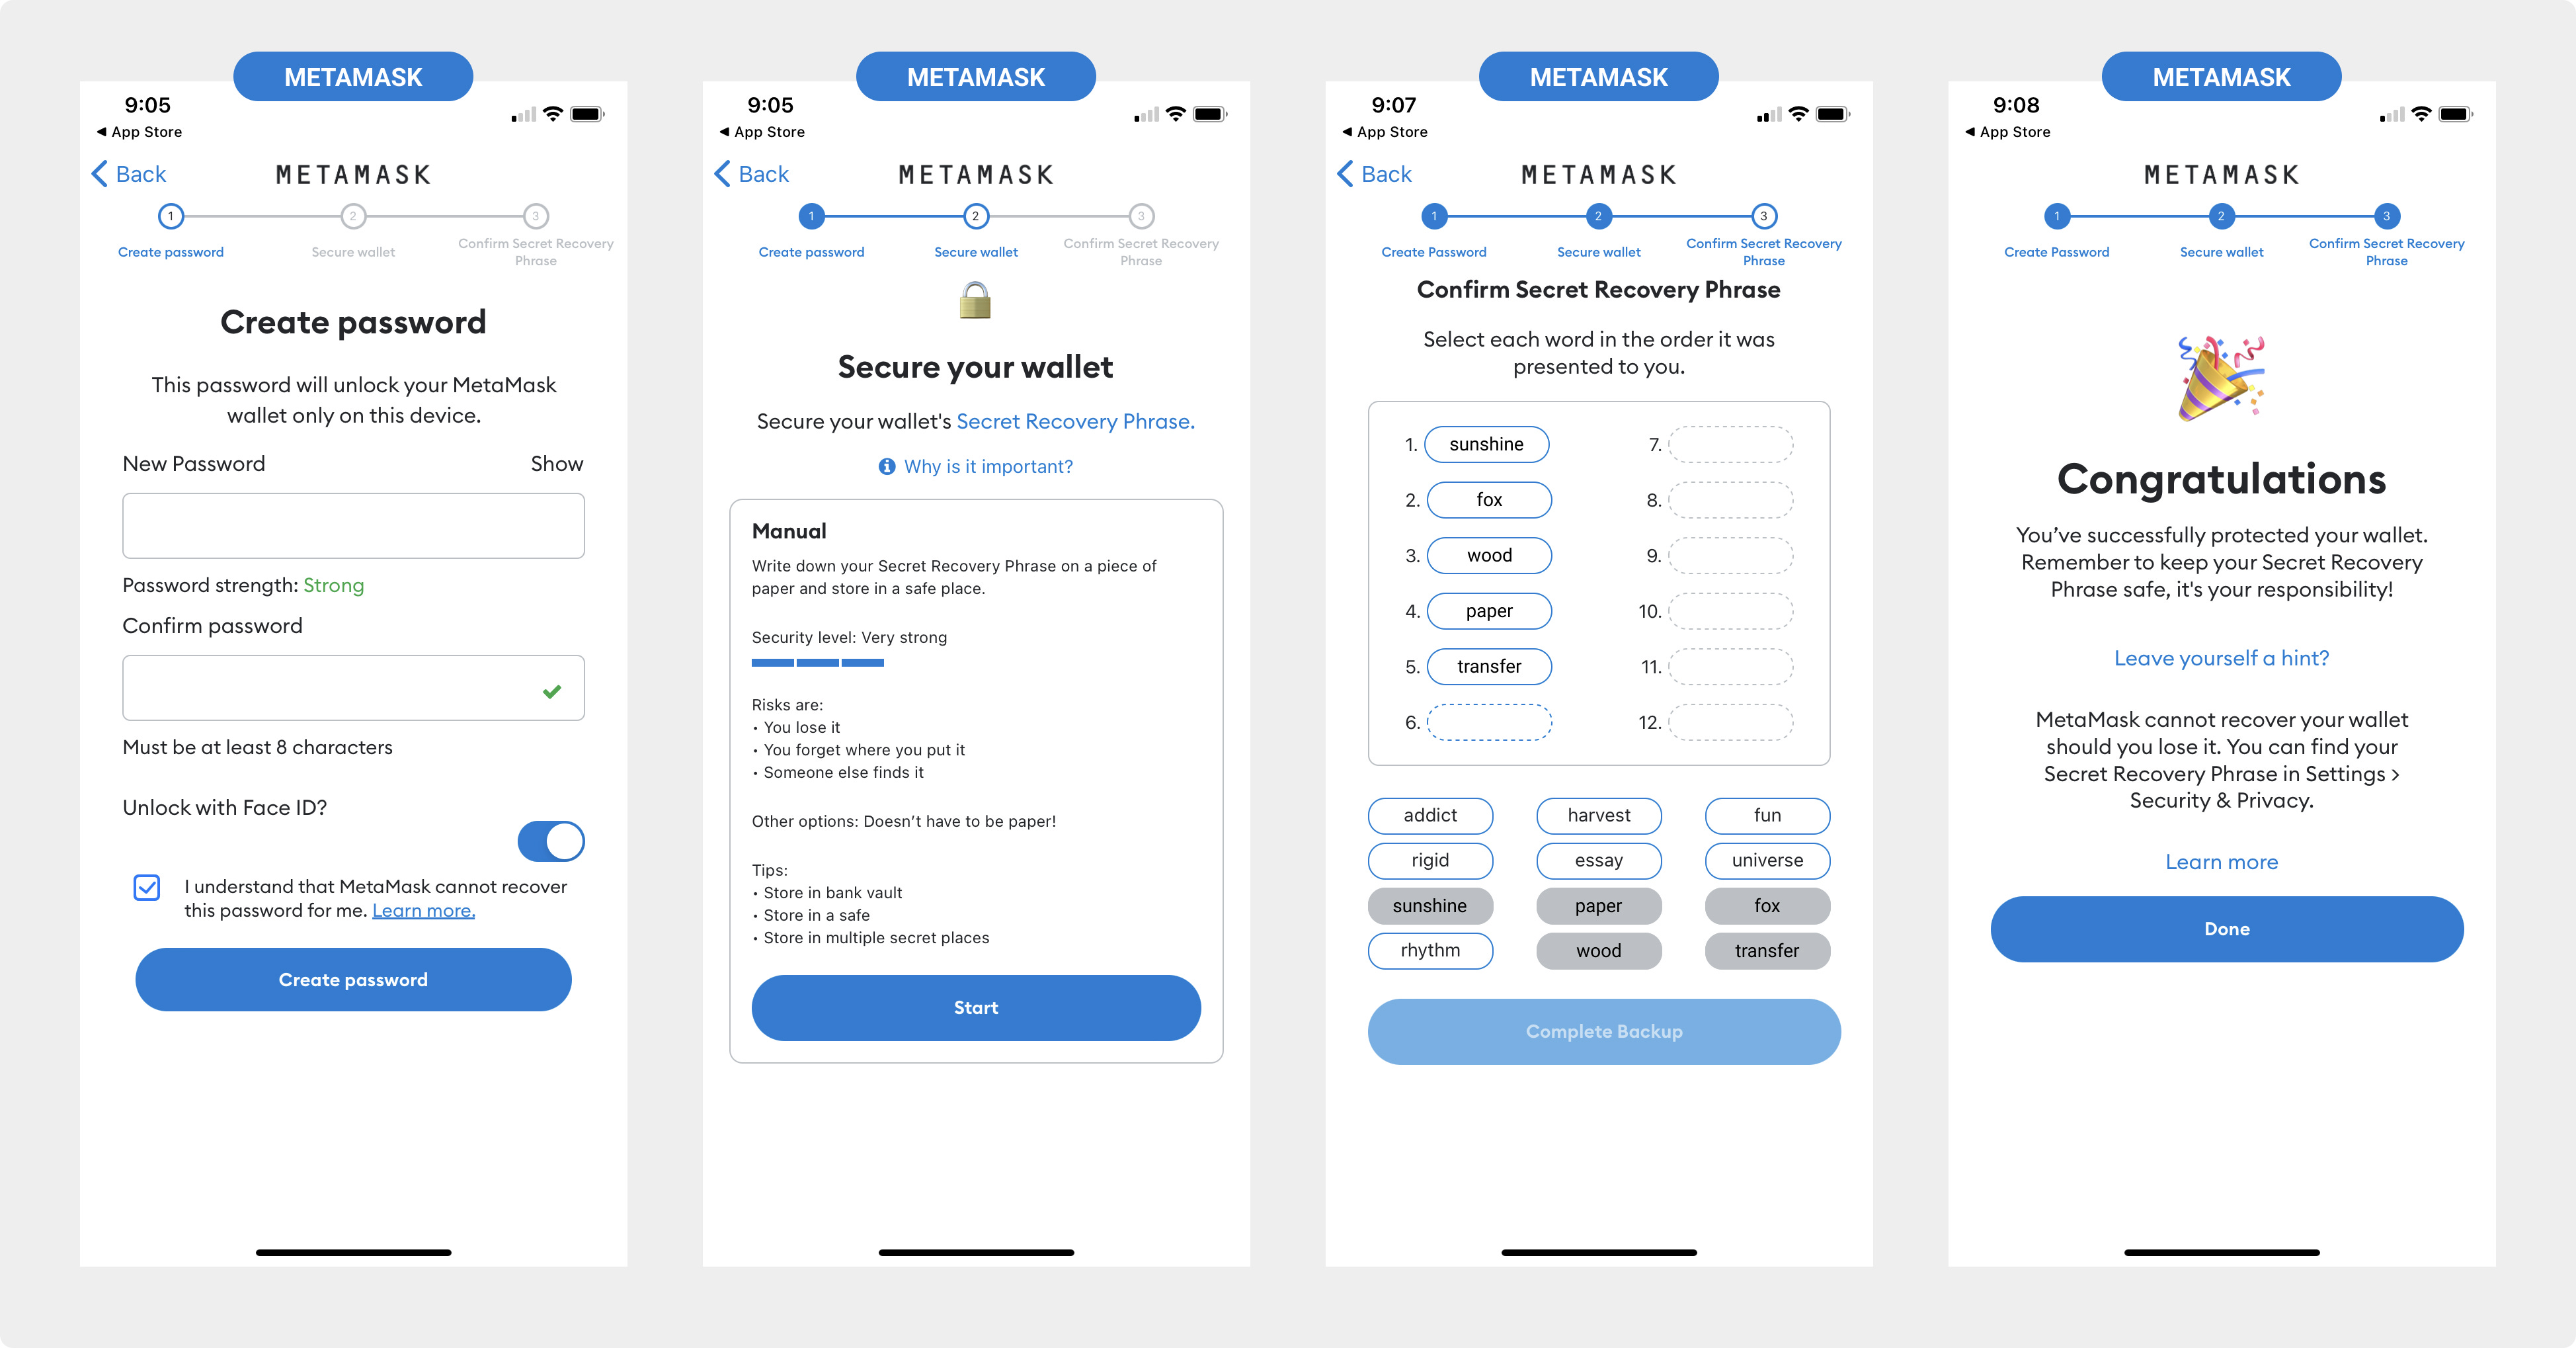
Next up, make it secure:
Keep your assets safe with a strong password and recovery phrase.
Use a password manager like 1password to store your information.
Create your password.
Get your secret recovery phrase (make sure to store this somewhere safe).
Confirm your secret recovery phrase in the next step.
You’re done with the security for now. Make sure both your password and recovery phrase are stored somewhere safe and accessible only to you.
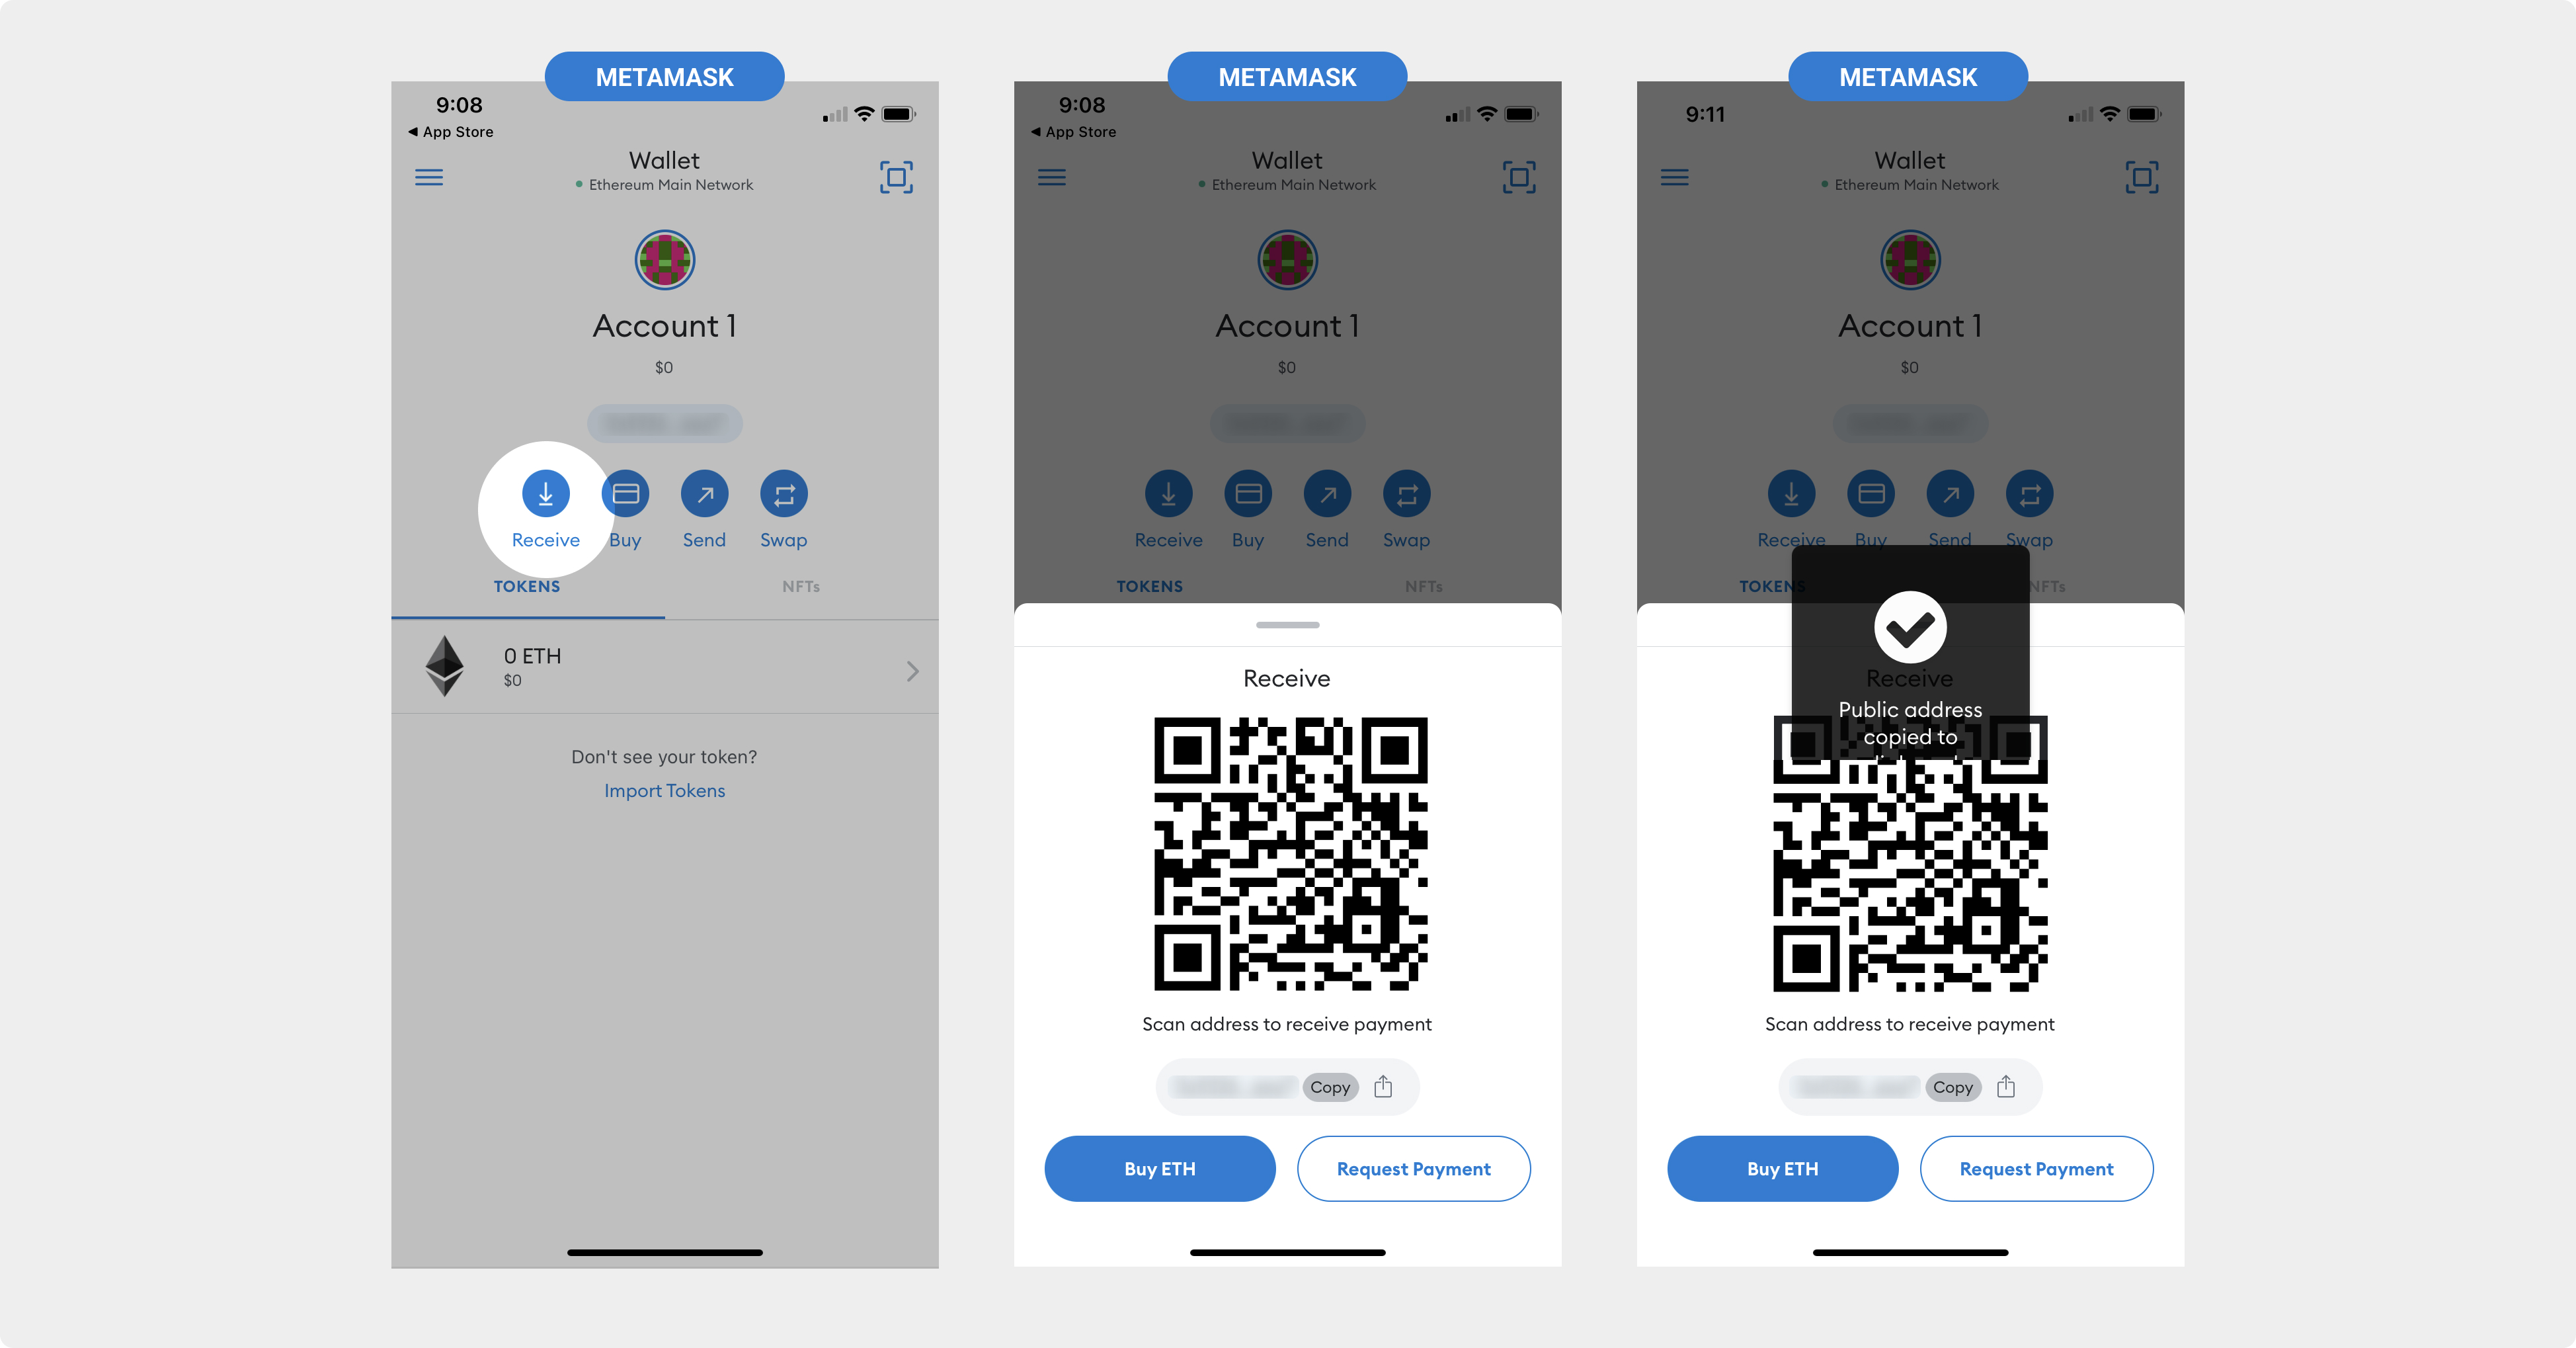
Now you’re in. Let’s transfer assets into your account:
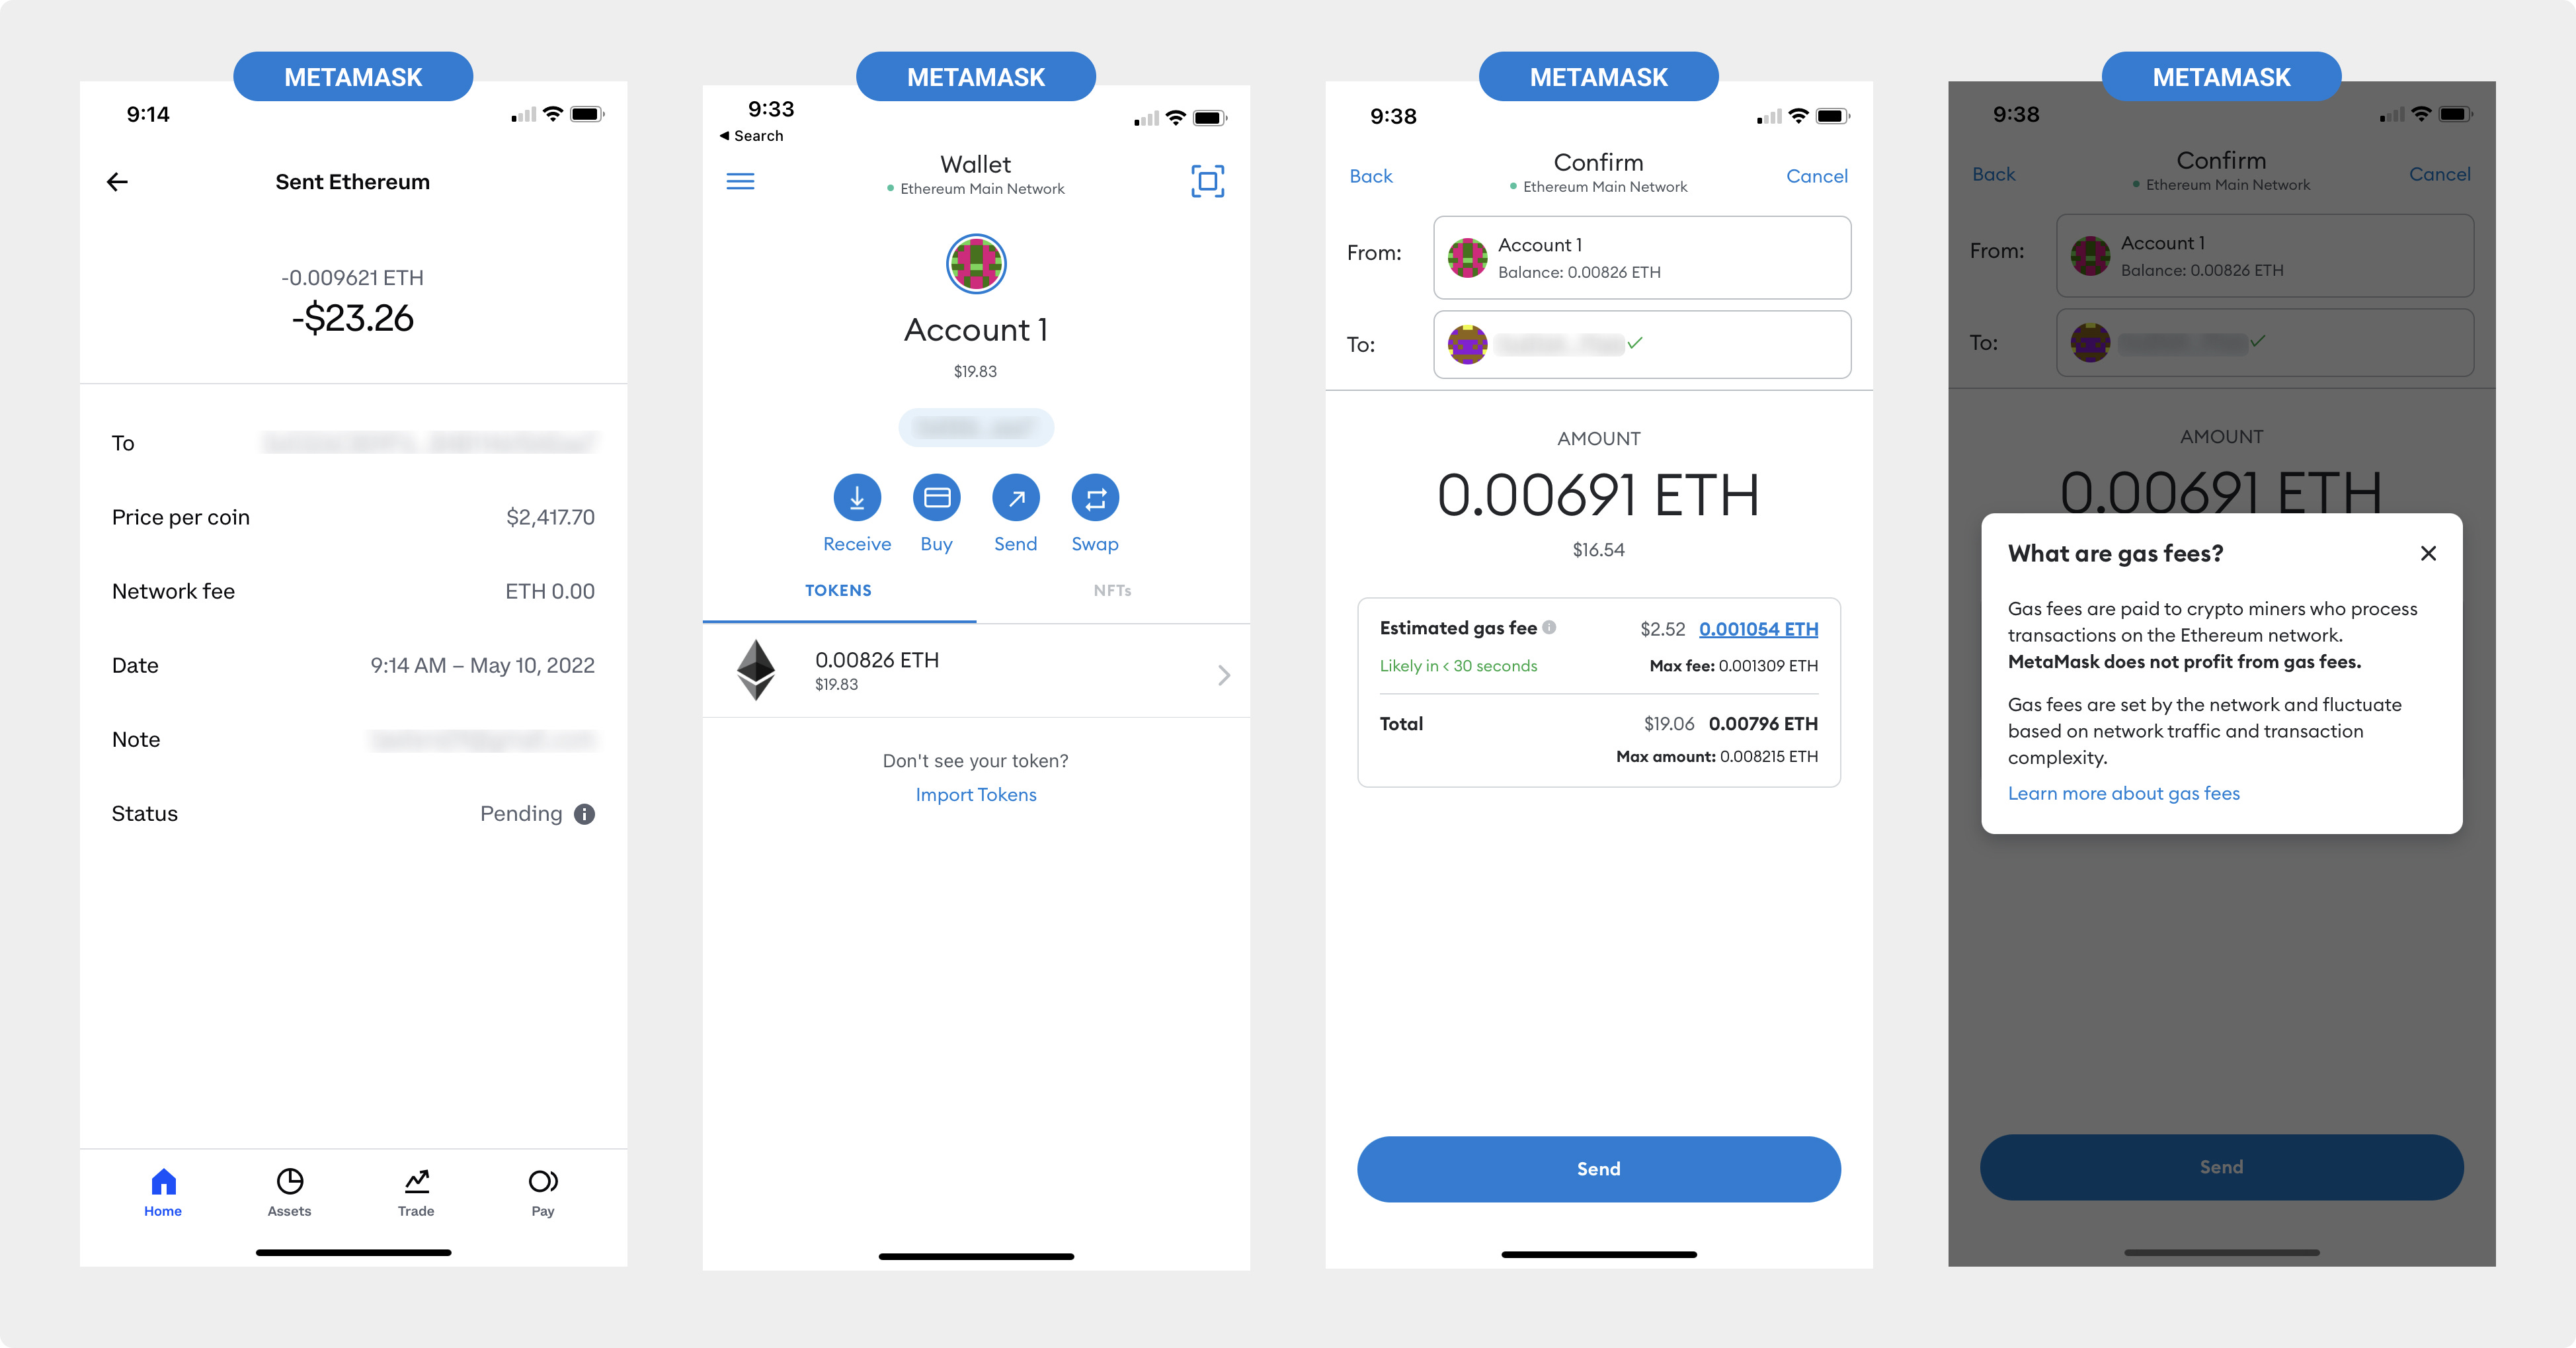
You have a wallet, let’s fund it.
Tap the ‘receive’ icon in the middle of the view.
Tap the copy button next to your public address.
Once you see the confirmation, your address is copied to your phone’s clipboard.
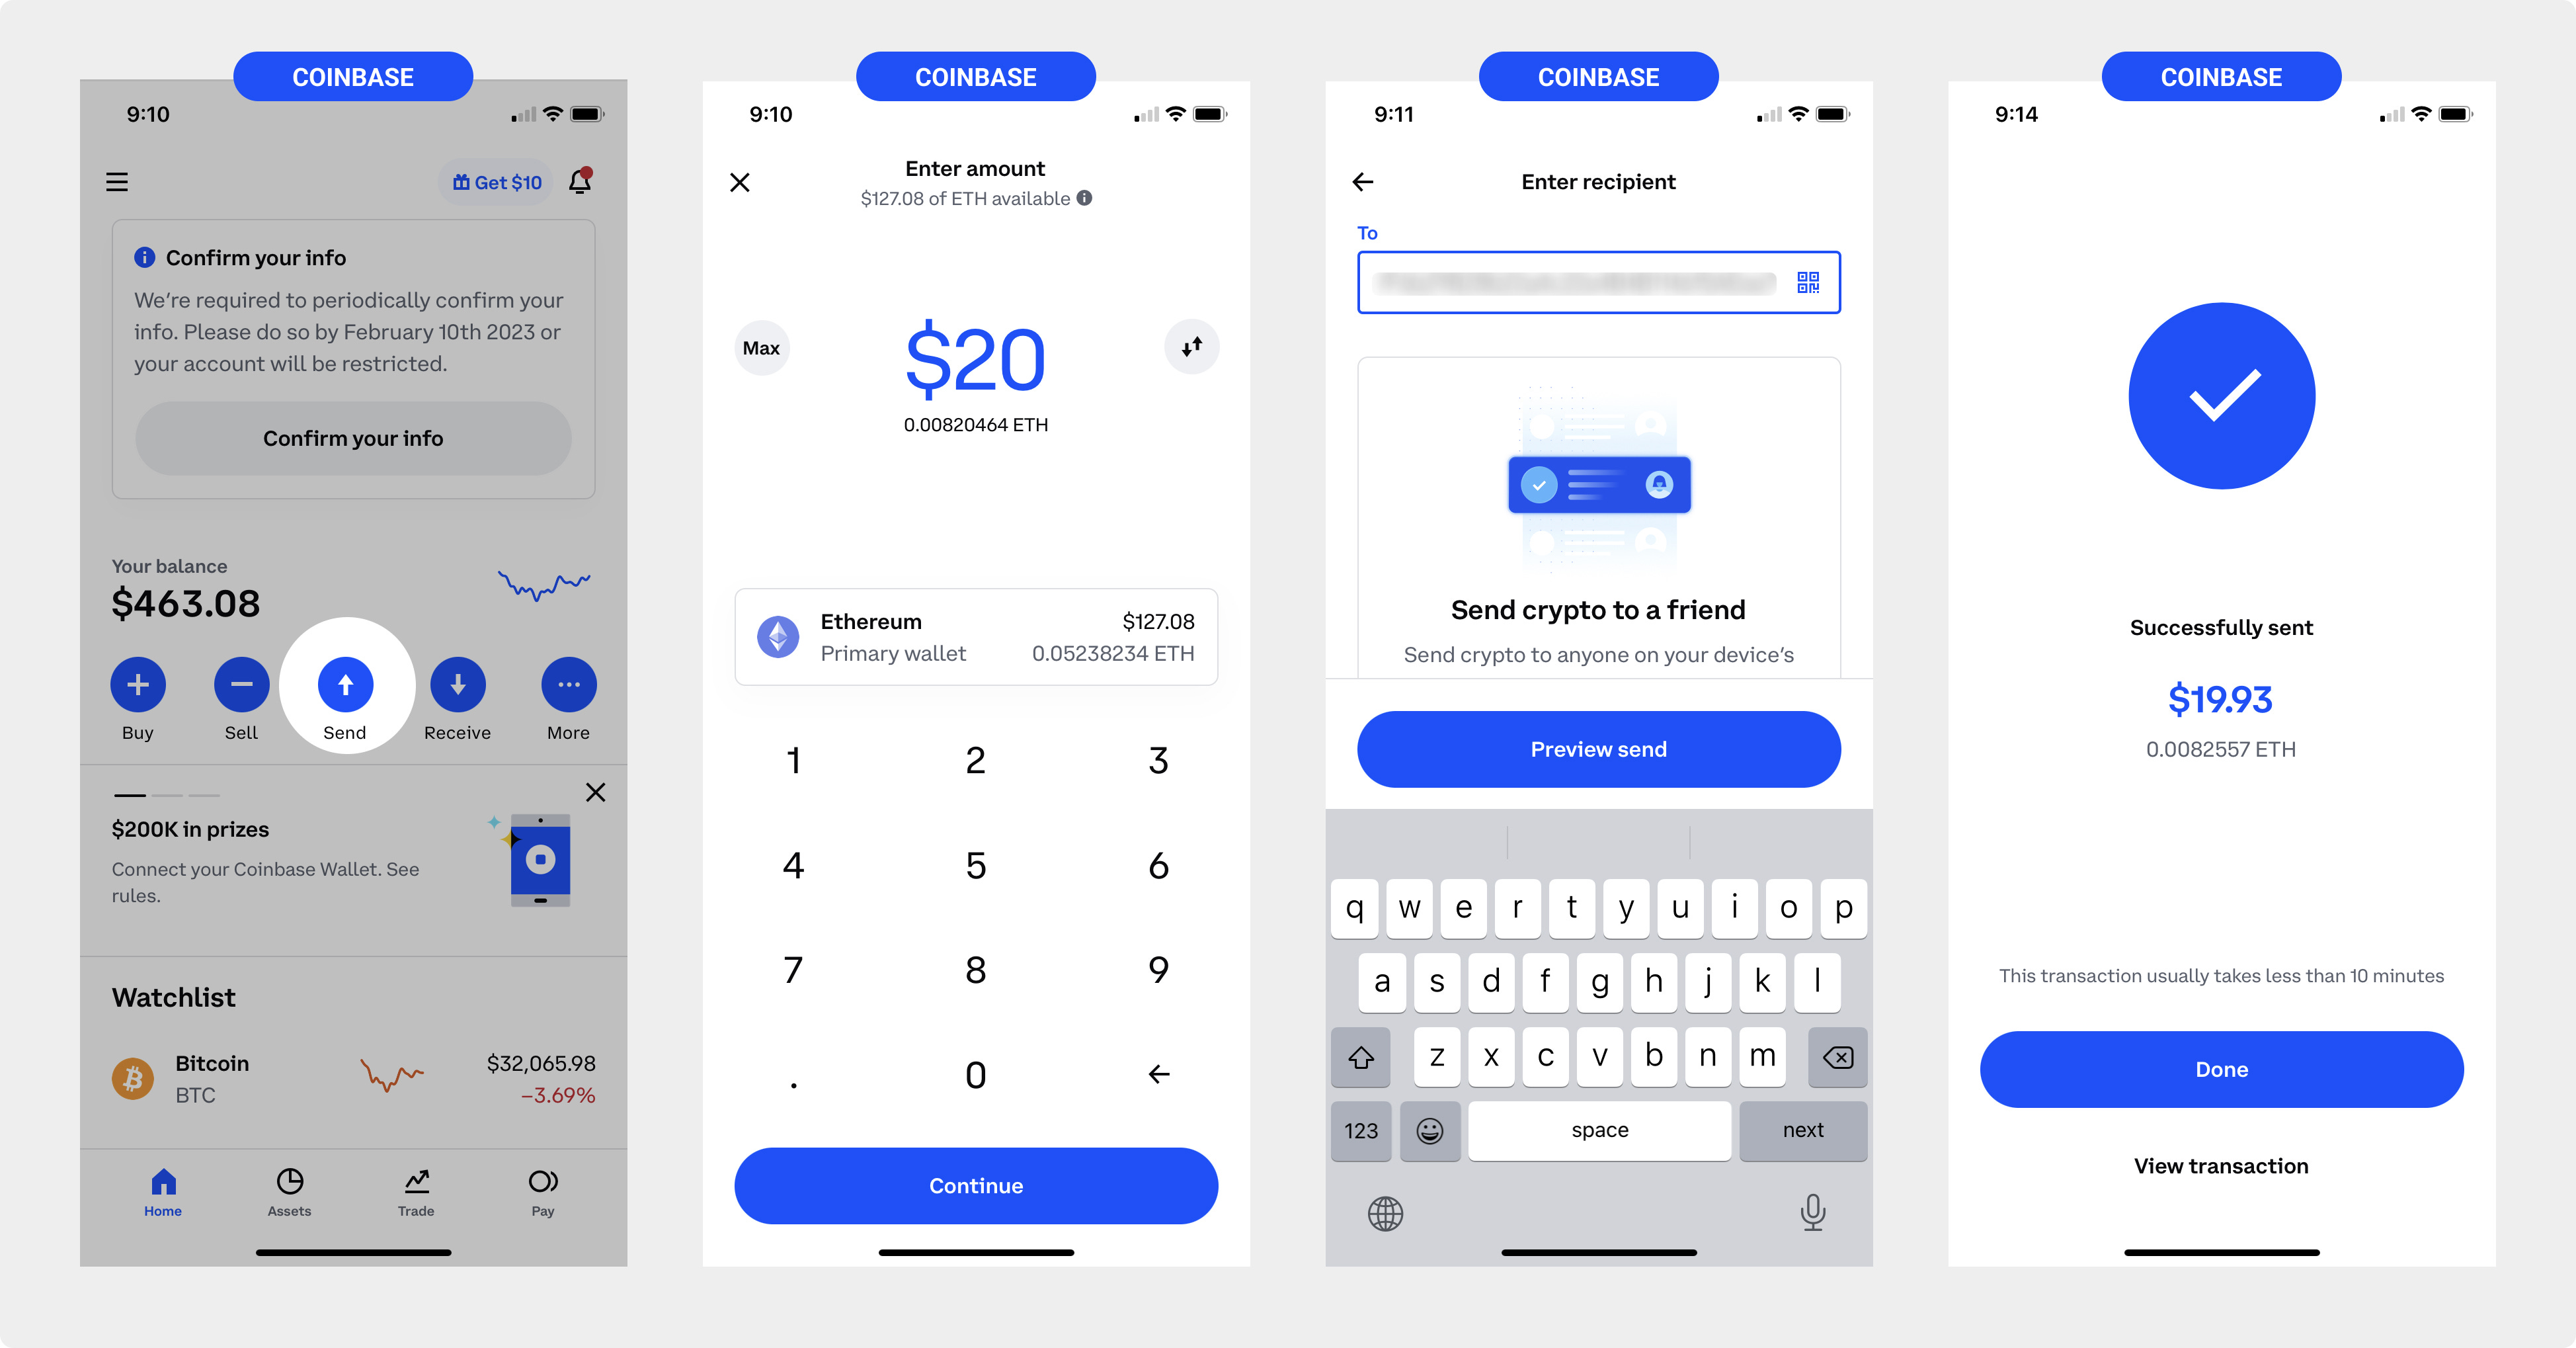
Next, go back to the Coinbase app to grab your money:
Haven’t done this yet? Read our article on buying digital currency here.
Tap the ‘send’ icon in the middle of the view.
Choose how much ETH you want to send to your MetaMask wallet.
Paste in your public address you copied in the last step.
Done! The transfer should process in about 10 minutes.
Go back to MetaMask to see the assets in your wallet:
You’ve got money in the bank 🤑 (or in this case, ETH in the wallet)
You should see the ETH in your wallet in under 10 minutes.
Now you can send money to other public addresses, buy things like NFTs, and store digital assets.
Read about gas fees here (more on this topic to come).
Wow, you did it - we’re impressed 🙌 You’ve taken the next step towards transacting in the world of web3. You bought crypto ✅, you have a non-custodial wallet ✅, and now you’re set to buy some things on the internet 🔮
Read more in our basics series:
💰 Money | Buy digital currency
🎨 Sell | Mint an NFT collection
See ya for the next one 👋 Team Velvet
—
Other topics or ideas? Respond to this email and we’ll add it to the list.
Want more from Velvet? Follow us on Twitter.
Obligatory note: We are not financial advisors or lawyers, and are not affiliated with any of these companies or recommendations. All thoughts are our own.