Mint and launch an NFT collection for under $600
This is part of Velvet Basics, our newsletter on how to join the world of Web3. Today's topic: We’ll walk you through the many steps of launching your NFT collection.
Today we’re walking through the process of launching an NFT collection. We were surprised by how many moving pieces there are to a successful launch. Technically minting an NFT isn’t too difficult if you’re using a platform like Foundation. It’s the preparation and the cost of gas fees that make it an investment.
Unlike our other articles, this takes more than 10 minutes and costs more than $20. We still think you should collaborate with a designer friend and try it out. You’ll learn quite a bit about what you can do with the current state of web3, and you’ll create something interesting along the way.
What you’ll learn:
Make art
Define the assets
Set up your profile
Mint the collection
Sell!
Commitment: If you just want to try minting something simple (like a shape you draw in Figma), you could do this in 10 minutes. If you want to launch a successful project that makes money, it will take a few weeks and $200 - $800+ depending on your costs of creation and gas fees.
Despite the fancy terminology - “minting” can be done on a variety of marketplaces. Popular platforms like Foundation and OpenSea are just a few of your options. We chose to mint and list on Foundation because the style of art was most similar, and their interface is nicely designed and thoughtful.
Need a refresh on the basics first? Check back on our past articles - buy crypto, set up a wallet, and buy an NFT.
Make art
If you’re not an artist yourself, you’ll need to find a designer friend to work with. As with most creative pursuits, it’s better to collaborate with an artist who will take ownership rather than just hiring someone to do the job. Ask people in your network or DM artists who match your style.
For our first collection, we worked with ML, a friend who is a professional brand designer. See more of her work here.
Set up the legal contract however you want, it’s just a standard contract work agreement. We decided on a discounted hourly rate to account for future proceeds from the NFT sales. ML sent us her contractor agreement to solidify the terms, including a section for how the NFT proceeds would be split equally.
“The Designer gives the right to the client to sell the intellectual property, and designer and client will split the royalties.”
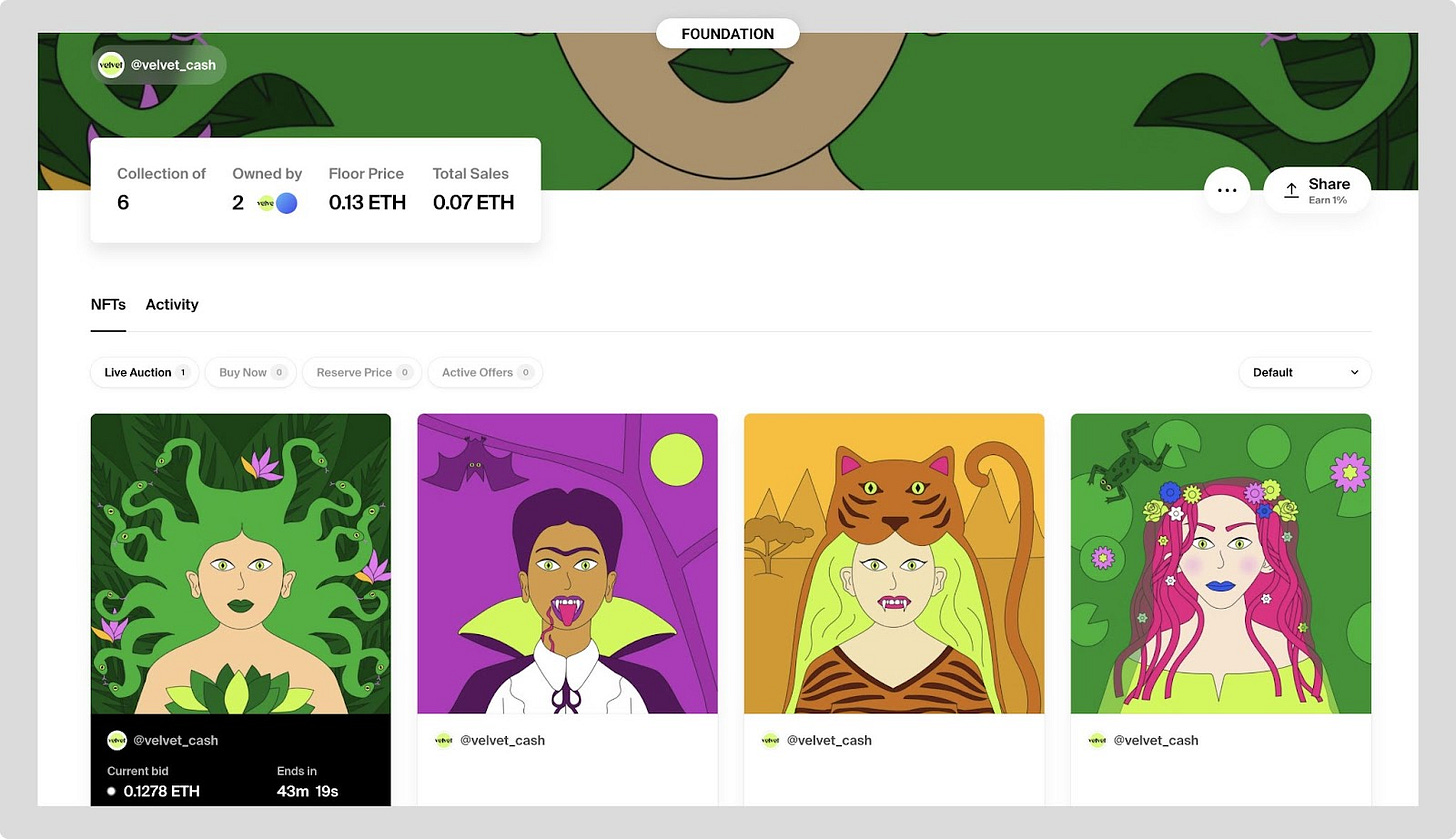
We spent the next week doing research on projects we liked and decided on the theme “smooth like velvet”. This led to the idea of a Medusa-inspired character who you can see here. ML iterated on the theme to create six more characters, each with their own magical realism story.
Make sure the asset specs match whatever platform you’re using to mint. We followed Foundation’s artwork guidelines, which you can find here.
Define the assets
Now that you’ve got the assets, it’s time to tell a story. Look at similar collections on NFT marketplaces for inspiration.
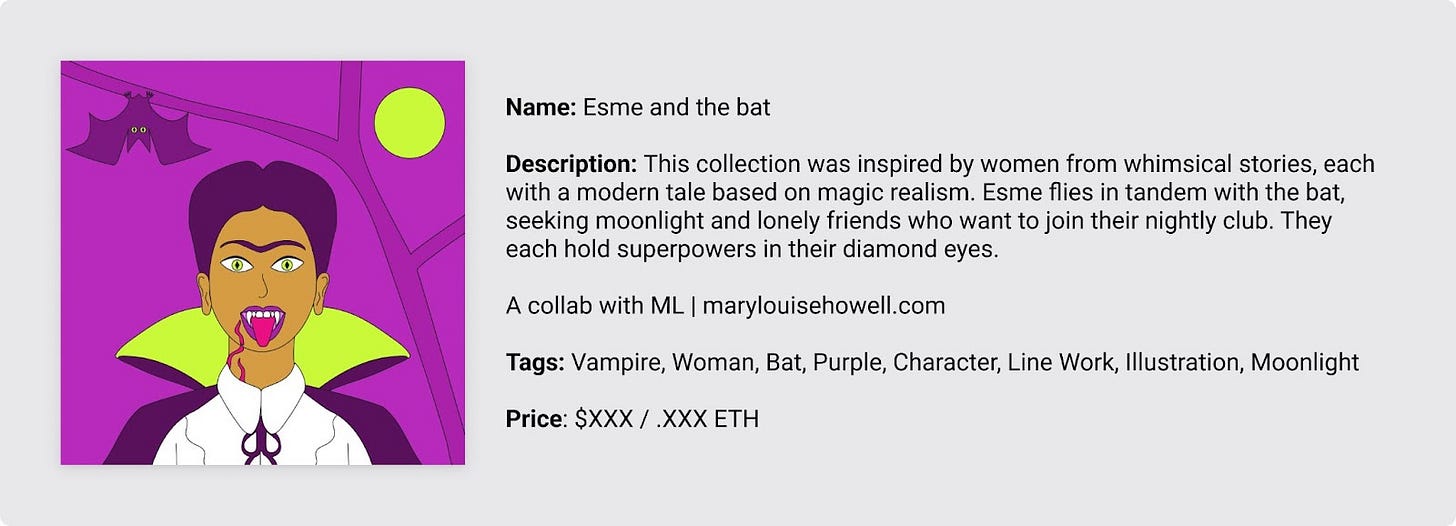
For minting on Foundation, we needed to prepare these items:
For the collection:
Collection name
Collection symbol
Logo or GIF
Cover image
For each NFT:
Title
Description
Tags (optional)
Price (optional)
Prep these ahead of time and stay organized. Each time you add something to the blockchain you have to pay gas fees. When you mint the collection, you pay a gas fee. When you set a price, you pay a gas fee. If you mess up, you have to burn the NFT and start over (we learned this the hard way, which increased our costs).
Create an account and profile
If you already know how wallet authentication works, skip this section. Otherwise, get both your computer and phone ready for a dual-screen log-in process.
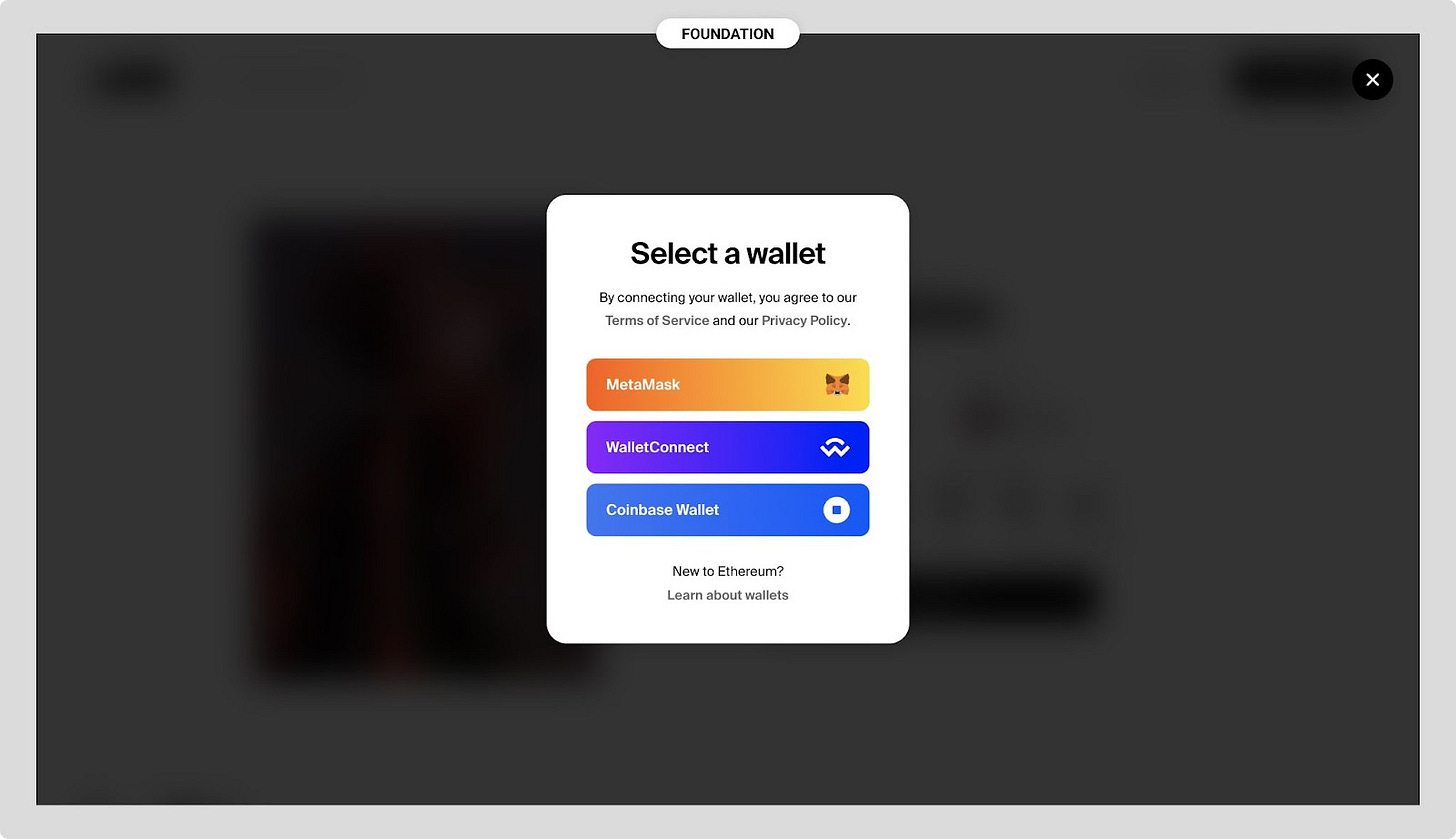
Step one, connect your wallet.
Enable your account and transactions.
This log-in process seemed annoying at first. But after doing it many times, we wish we could use a wallet to log in to every system. Follow the pictures if these instructions sound complicated. It quickly becomes intuitive.
Website: Navigate to the Foundation home page on your computer.
Website: Tap the “connect wallet” button in the top right
Website: Tap “WalletConnect” and choose MetaMask (or whatever wallet you want)
This is where your hand-eye coordination skills will come into play. We’re moving to two screens.
MetaMask: Open that wallet app on your phone.
MetaMask: If you’ve created multiple wallets in MetaMask, make sure you’re logged into the wallet you want to use to mint your collection and NFTs. We recommend you create a new wallet just for this purpose.
MetaMask: Tap the scan icon in the top right corner of your MetaMask home screen
MetaMask: Scan the QR code
Get comfy with this process of “signing” for transactions. It’s going to happen many times from here on out.
Website: Tap “continue” in the Foundation modal
MetaMask: Tap “connect” in the modal that pops up in your MetaMask wallet
Step two, create your profile.
Set up the brand and identity of your minting profile, and verify.
You know how to do this - Add a profile image, cover image, and a snappy description.
Verify your profile before you can mint. If you want to verify with Twitter, you have to post your public wallet address. It’s annoying and public. This is another good reason to use a unique wallet just for this project.

Mint the collection and each NFT
It’s time to mint! Make sure all your assets are organized before getting started. The blockchain is not forgiving, and mistakes will cost you gas fees when you have to burn the NFT and mint again.
You can read through the Foundation help docs here if you get stuck.
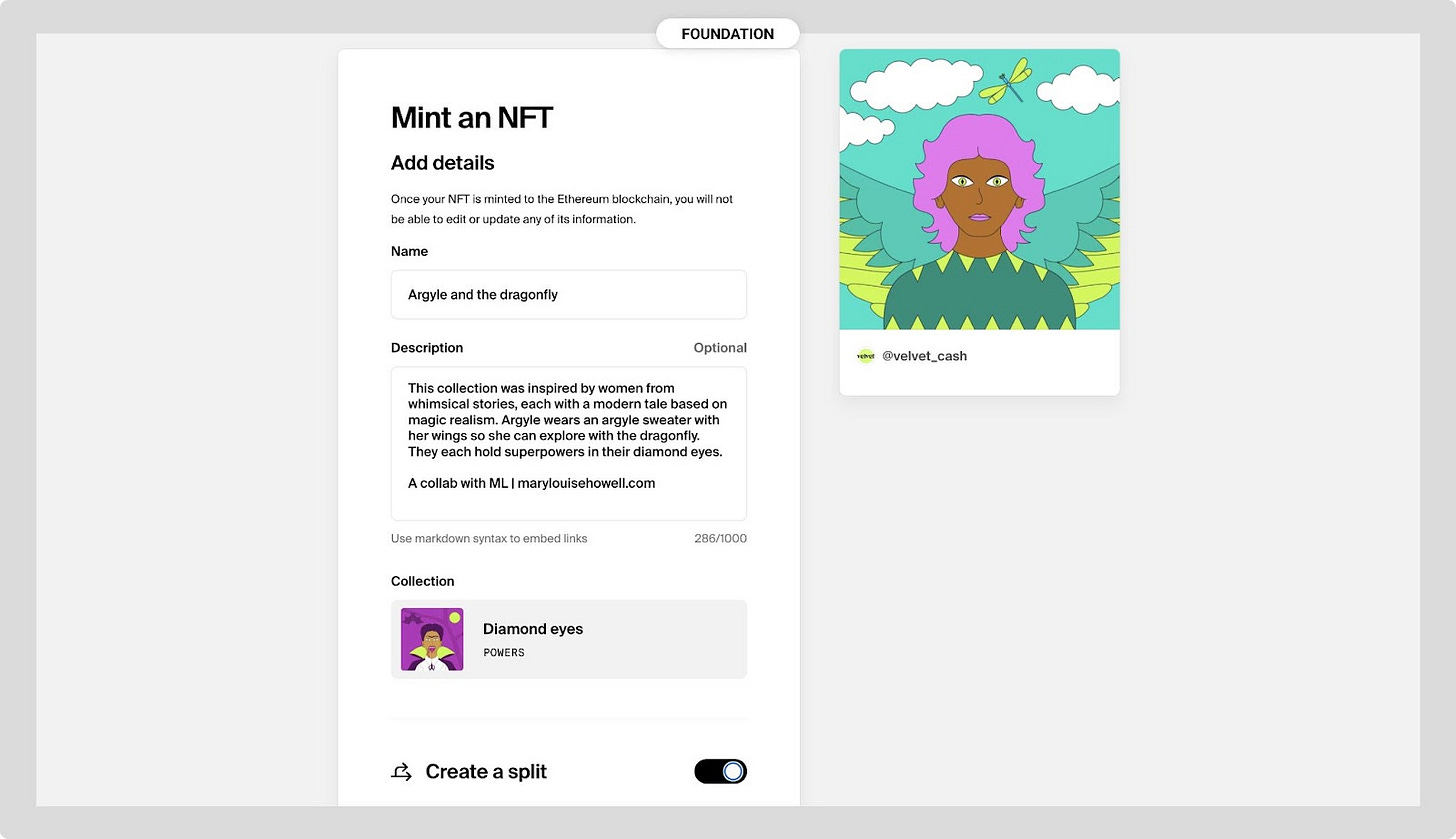
Tap “Mint NFT” from your new collection page.
Upload the asset. Input the name and description.
Double-check your work! You can’t change anything on this page after the mint is complete, and you’ll be paying gas fees to complete the transaction.
If you partnered with anyone else, here is the place to split royalties on future sales. Add your partner’s public wallet address and choose split percentages. In this case, we chose a 50/50 split based on the terms of our legal agreement. So for all future transactions, we’ll split royalty earnings in half. Foundation takes 5%.
Add your partner’s wallet address.
Choose the percentage split.
Tap “Mint NFT” to initiate the transaction.
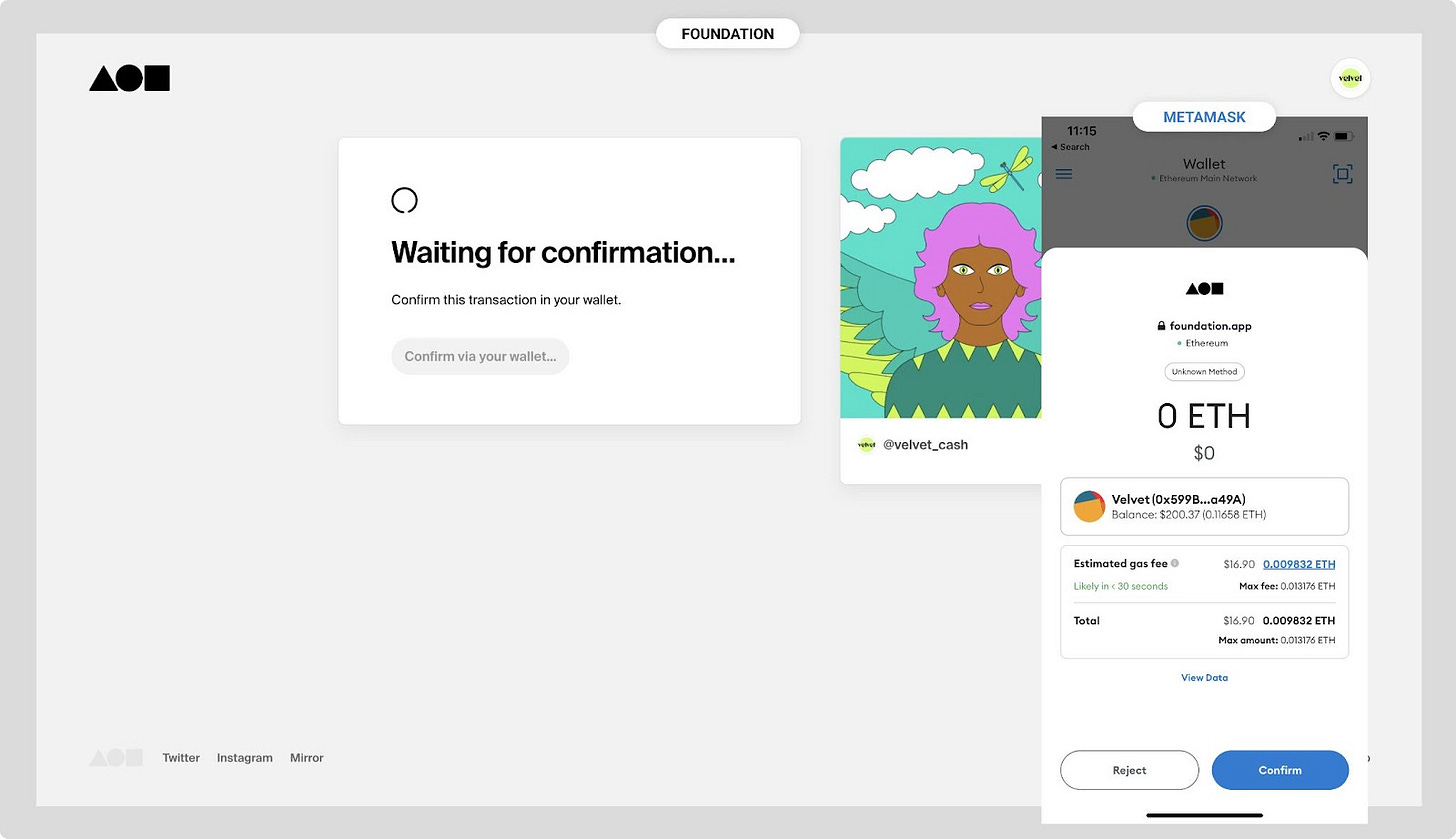
We’re back to the dual-screen modality.
Open MetaMask on your phone.
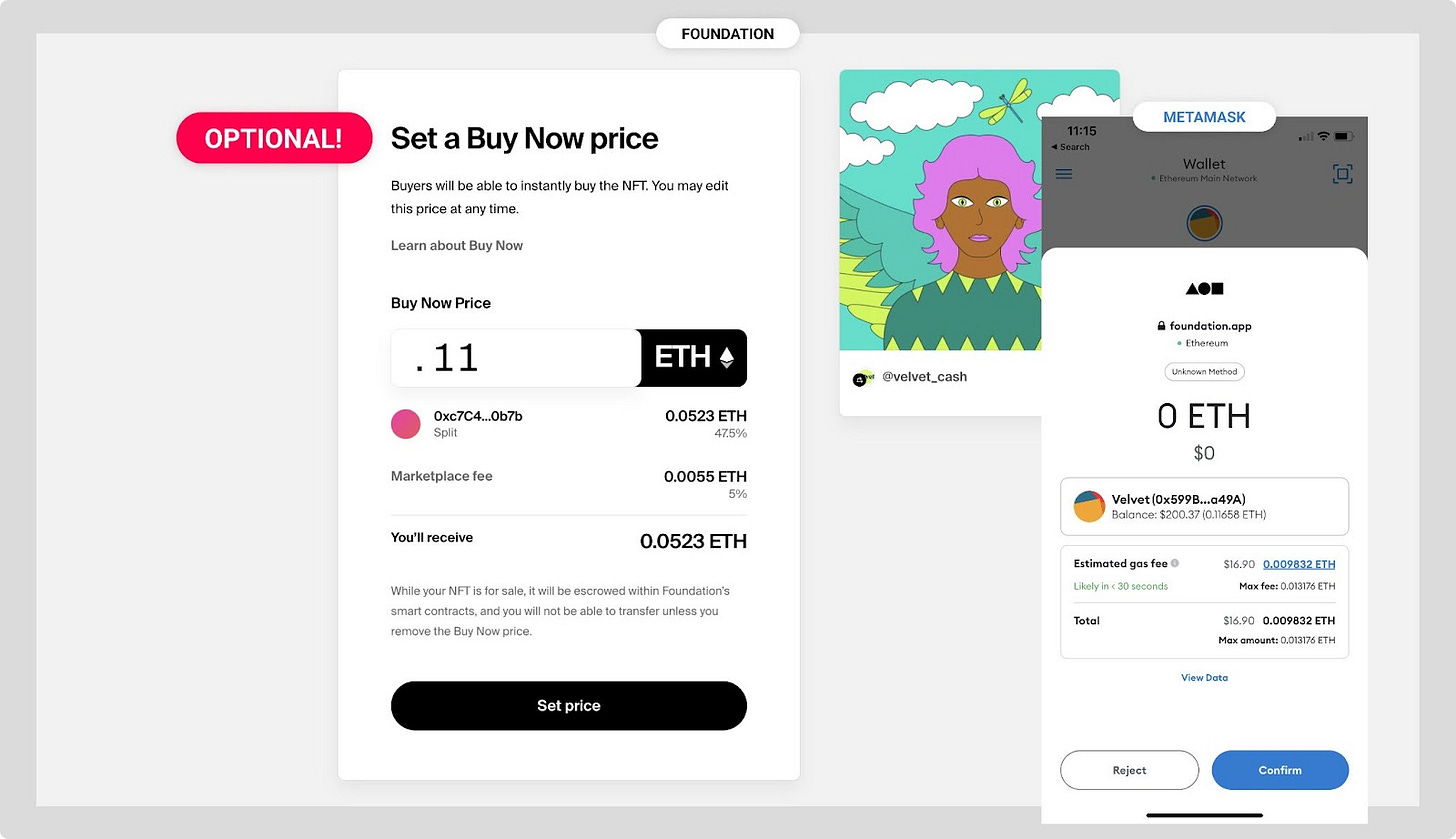
Check the gas fee price. It will change every few seconds.
Tap “Confirm” if you’re okay with the price. Otherwise, come back later.
Tips: If you don’t have enough ETH to cover the transaction, you’ll need to buy more and transfer it into your wallet. You can do this by purchasing ETH in Coinbase, then transferring it to your MetaMask account using your public wallet address. Unlike a wire transfer, this transaction should go through in less than 30 seconds. See more detail in our buy an NFT article.
Each transaction on the blockchain requires a gas fee. The day we minted, gas fees ranged from $9-30 USD per transaction.
Congratulations! The first NFT in your collection has been minted. The following steps are OPTIONAL and you can do them later if you want to. Setting a price seems like a requirement in this Foundation flow, but it’s not required. It will cost gas money, so we recommend holding off until you’re ready to sell.
Set tags for people to search and find this NFT. Add up to 10.
Set a price. You can check the conversion price of ETH to USD using a calculator like this one from Coinbase.
Time to sell
Your beautiful collection is ready to shine ⚡️ You can wait for offers to come in organically, market it to your audience, or start an auction.

Great job, you’ve minted your first NFT. Through this process, you learned how to connect a wallet to a platform, trigger a transaction on the blockchain, and launch a web3 project. Plus, if you get this process right you might even make a profit.
Want to check out our completed project? See our first collection here.
Read more in our basics series:
💰 Money | Buy digital currency
See you next time 👋 Team Velvet
—
Other topics or ideas? Respond to this email and we’ll add it to the list.
Want more from Velvet? Follow us on Twitter.
Obligatory note: We are not financial advisors or lawyers, and are not affiliated with any of these companies or recommendations. All thoughts are our own.


